which part exactly? show screenshot of progressI was able to export the generated mesh from the fastlane. But I can't follow the last steps they told me.
SOLVED How to make the groove 3d?
- Thread starter Frank Alexandre
- Start date
Ariel Suraniti
Member
This...which part exactly? show screenshot of progress
oh and after that you must
-make a copy of all the ground layer-stuff
-join it all together, call it "shrinktarget"
-then add a shrinkwrap modifier to "fast_lane.ai" with target "shrinktarget"
-play with "Offset"
-select all road parts where the groove is above -> Shift+D (duplicate), return or click to confirm location
-Ctrl+J (Join)
-F2 (rename) -> "shrinktarget"
-select fastlan (your new groove mesh)
-add shrinkwrap modifier
-set "Snap mode" to "Above surface"
-set "Target" to "shrinktarget"
-play with "Offset", depending on your unit settings in blender, 0.01 is 1 cm above the surface
-Ctrl+J (Join)
-F2 (rename) -> "shrinktarget"
-select fastlan (your new groove mesh)
-add shrinkwrap modifier
-set "Snap mode" to "Above surface"
-set "Target" to "shrinktarget"
-play with "Offset", depending on your unit settings in blender, 0.01 is 1 cm above the surface
Ariel Suraniti
Member
Thanks a lot. I could creat it. I have new problem with materials and map... Could you help me about it?dude this is as granular as it can get
https://assettocorsamods.net/threads/how-to-make-the-groove-3d.209/#post-18740
-set face selecting mode
-select one face so it gets white, and another face so you cover the road-width:

-then hit "U" in 3d-viewport ->Unwrap

-select one face so it gets white, and another face so you cover the road-width:
-then hit "U" in 3d-viewport ->Unwrap
Last edited:
now this new uv-area must be aligned to be perfectly rectangular, in UV-editor hit "W" to get this menu used:
(if its already looking square-ish - dont let the looks fool you, its probably not !)
(if its already looking square-ish - dont let the looks fool you, its probably not !)
Last edited:
then back to 3d-viewport, select all with "A" then "U" again
but now -> "follow active quads"
it will auto-continue the uv-map, the white face used as base:
done!
but now -> "follow active quads"
it will auto-continue the uv-map, the white face used as base:
done!
Last edited:
Ariel Suraniti
Member
I could do it. Now I have a problem with materials and textures. When I open it in the kseditor, the texture does not appear. There is the groove, but transparent. You can't see the gumming.then back to 3d-viewport, select all with "A" then "U" again
but now -> "follow active quads":
done!
How do I assign a transparent material to it? Thanks
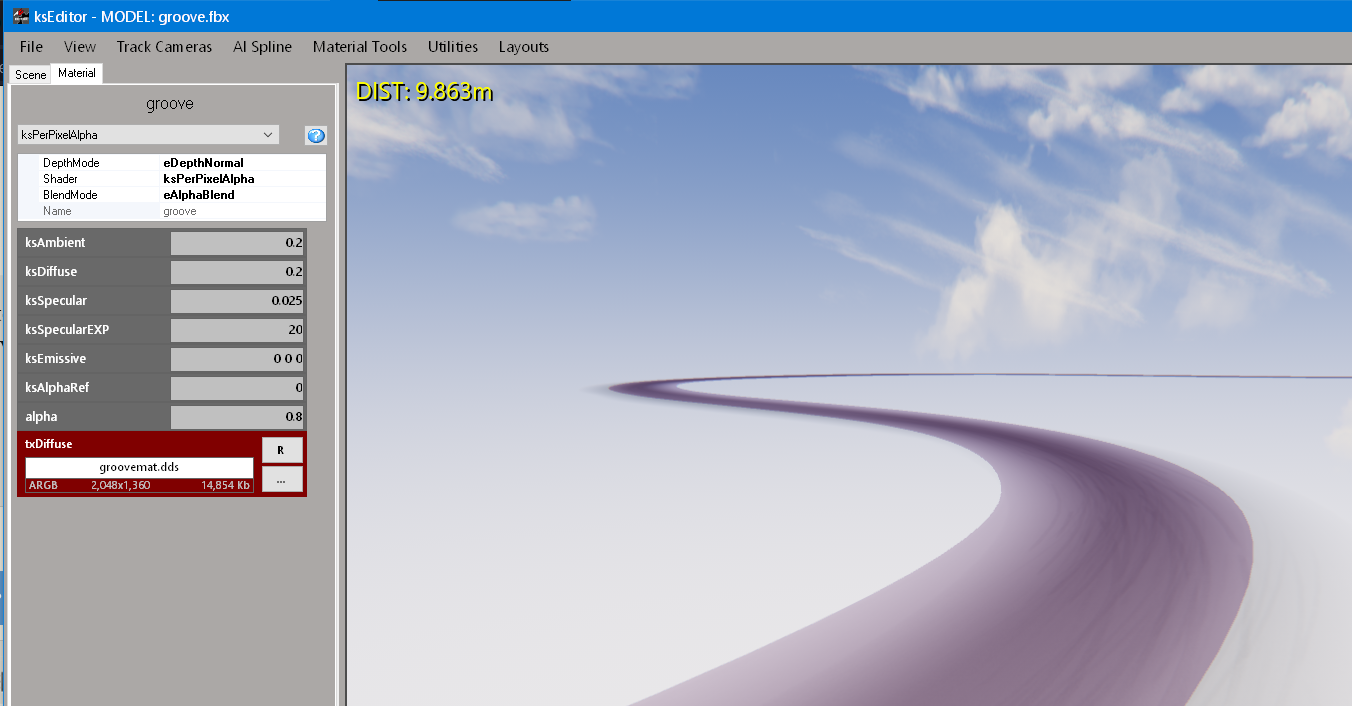
use Shader "ksPerPixelAlpha" and settings like this
(maybe DepthMode = eNoZWrite, but idk when/when not to use)
BlendMode: AlphaBlend
alpharef=0.5
alpha>0
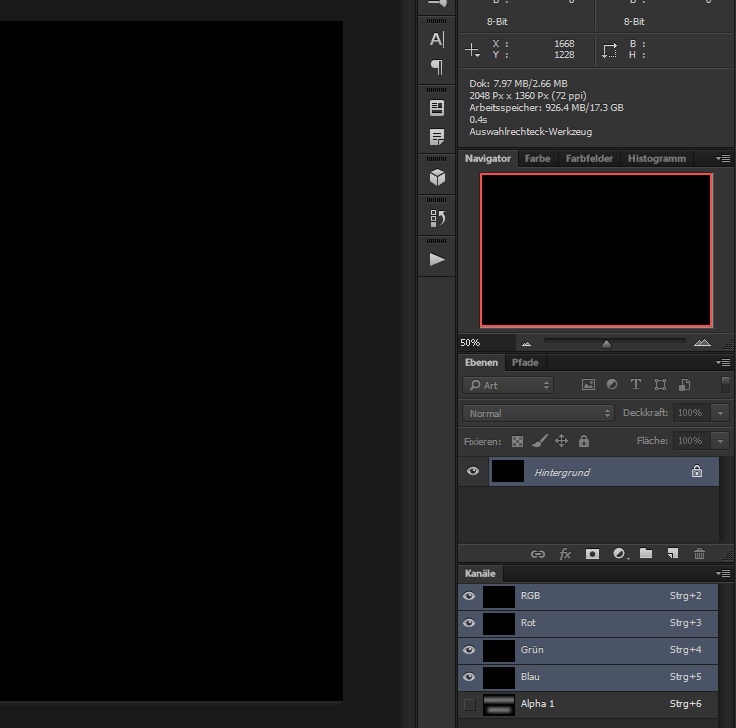
groovemat.dds
is basically black in rgb channels, only the alpha channel has something
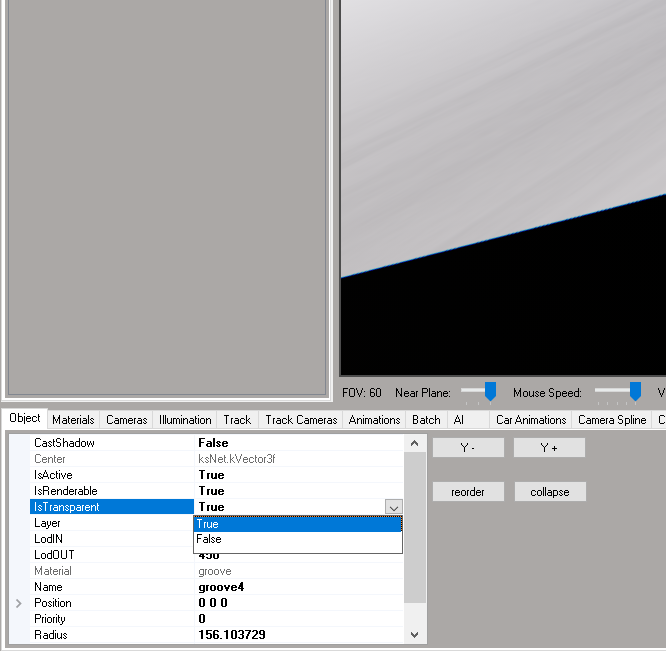
and set all the meshes to TRANSPARENT=True:
(maybe DepthMode = eNoZWrite, but idk when/when not to use)
BlendMode: AlphaBlend
alpharef=0.5
alpha>0
groovemat.dds
is basically black in rgb channels, only the alpha channel has something
and set all the meshes to TRANSPARENT=True:
Last edited:
Ariel Suraniti
Member
Thanks to everyone who helped me. I can do it easily on all tracks. This community is of great help for those of us who, without having too much technical knowledge, dare to try it. I celebrate that. Greetingsuse "ksPerPixelAlpha" shader and settings like this
View attachment 6842
groovemat.dds
is basically black in rgb channels, only the alpha channel has something
View attachment 6843
and set all the meshes to:
View attachment 6844
GRLap
Member
Happy new year.
New year, but as usual I'm completely confused.
I am developing a new track and want to create the AI "fast lane" and "pit lane".
I see tutorial videos making these lanes w/ AC content manager developer tools and "driving around". However, based on this thread it would appear you can produce the two "lanes" from the 3D model. I've made this track so I have the 3D model and would like to produce the lanes in Blender.
I don't understand the workflow as described here. I could create a curve or mesh object that follows the fast line but I don't see how those would be turned into "fast lane.ai" and "pit lane.ai," particularly since the .ai file type is not recognized by blender and I would have no clue how to export an .ai file.
Also, as these all seem related to a fast or racing line, can someone please explain what are:
"groove.txt" in data folder
"groove.kn5" in main folder
"ideal line.ai" in data folder
and how these are related to or different from "fast lane"
thanks in advance.
Last edited:
making fast_lane.ai, you need that anyway for a fully working track: https://assettocorsamods.net/threads/red-line-track.1806/#post-13007
Blender import addon for fast_lane.ai: https://github.com/leBluem/io_import_accsv
Blender import addon for fast_lane.ai: https://github.com/leBluem/io_import_accsv
GRLap
Member
I see..., tymaking fast_lane.ai, you need that anyway for a fully working track: https://assettocorsamods.net/threads/red-line-track.1806/#post-13007
Blender import addon for fast_lane.ai: https://github.com/leBluem/io_import_accsv
see tracks\ks_barcelona\layout_gp\data\groove.ini"groove.txt" in data folder
"groove.kn5" in main folder
(not .txt
") )
)lists all meshes acting as groove, and some params for alpha value to make it dynamic
edit: the name of your kn5 can be whatever, as long as whatever is mentioned in models.ini
GRLap
Member
I've been all through this thread - countless hours of work - and I can't make the groove work.
I extruded a groove along a modified fast_lane.ai converted to a curve.
The groove sits 1.8 centimetres above the track object.
The shader and object settings are as in #50 above; you can see them in image. The texture is from an existing track.
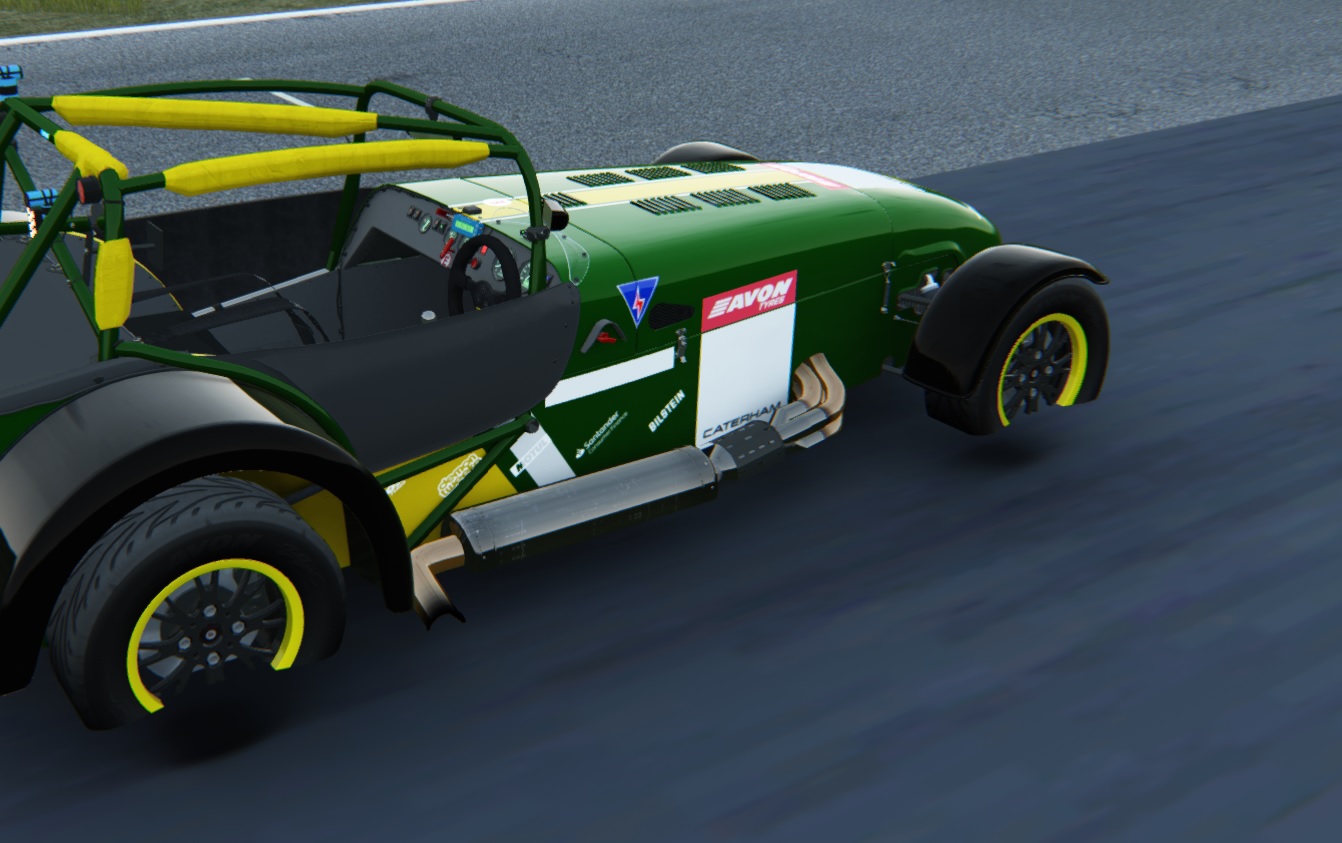
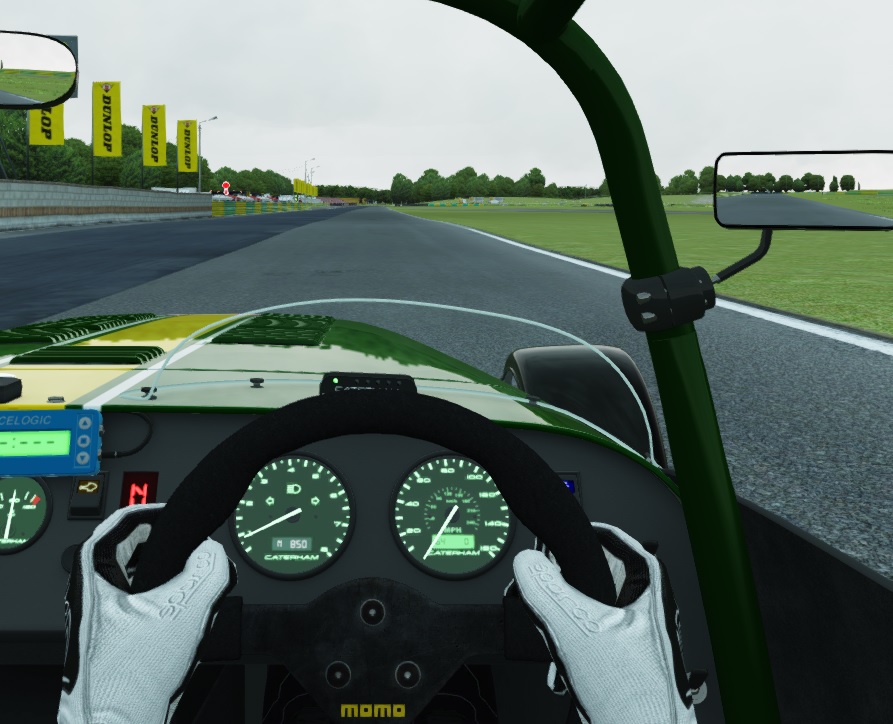
In KS editor the groove is a dark path; looks completely unrealistic and nothing like the grooves on other track mods (see image 1.).
Worse still, in Assetto Corsa the car is immersed in the groove, as though it's in six inches of mud (see image 2.). And this is despite the groove object sitting 0.00018 metres above the track surface.
1. My track-groove in KS Editor
2. My track-groove in Assetto Corsa
I'm at my wit's end here and need help!
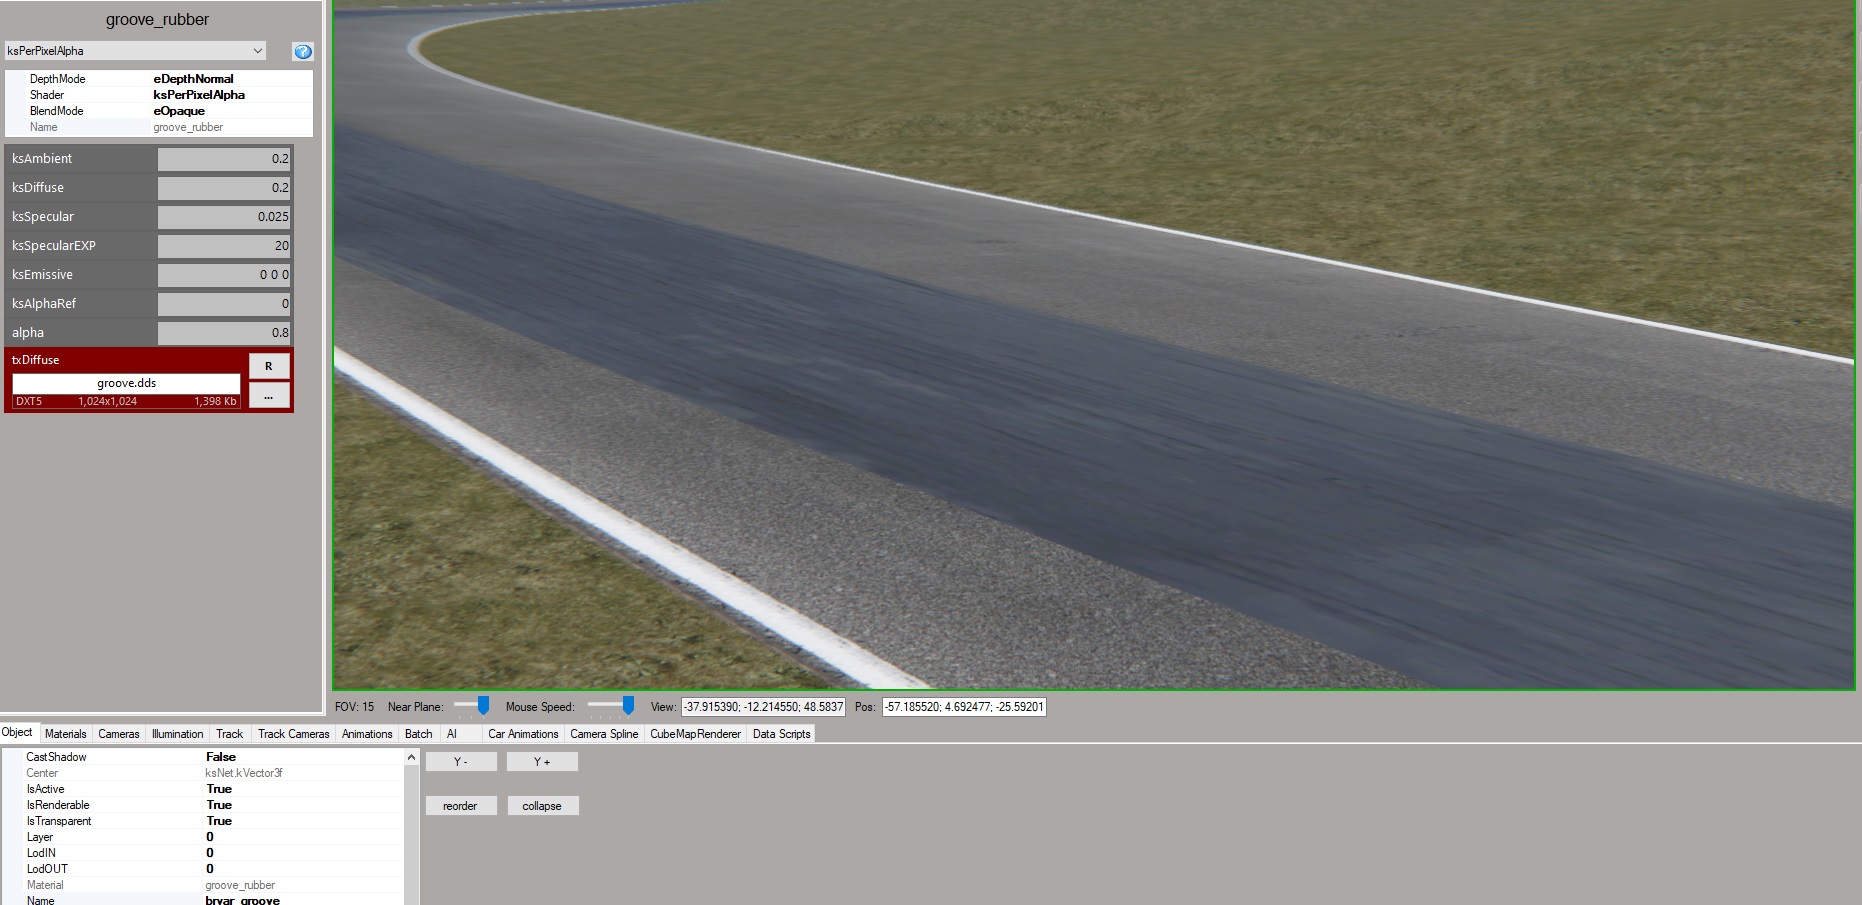
As an experiment, I examined the groove on a track that works "properly" in Assetto Corsa. The groove in this circuit "works" (see image 3.) I then extracted its groove 3d object, texture and persistence files. But when I import those extracted files directly into KS Editor - with no changes - and export them back to .kn5, I get a similar result as in my disaster, i.e. a patchy "painted" groove in KsEditor (see image 4.) and the same in Assetto Corsa (see image 5.)
Image 3. Circuit with working groove in Assetto Corsa
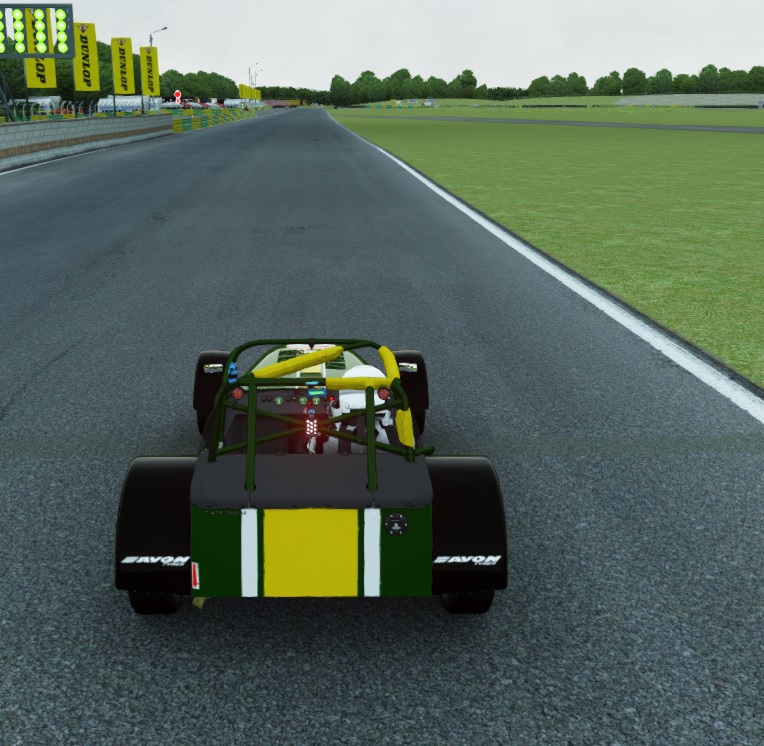
Image 4. Working circuit's groove (after export) in KS Editor
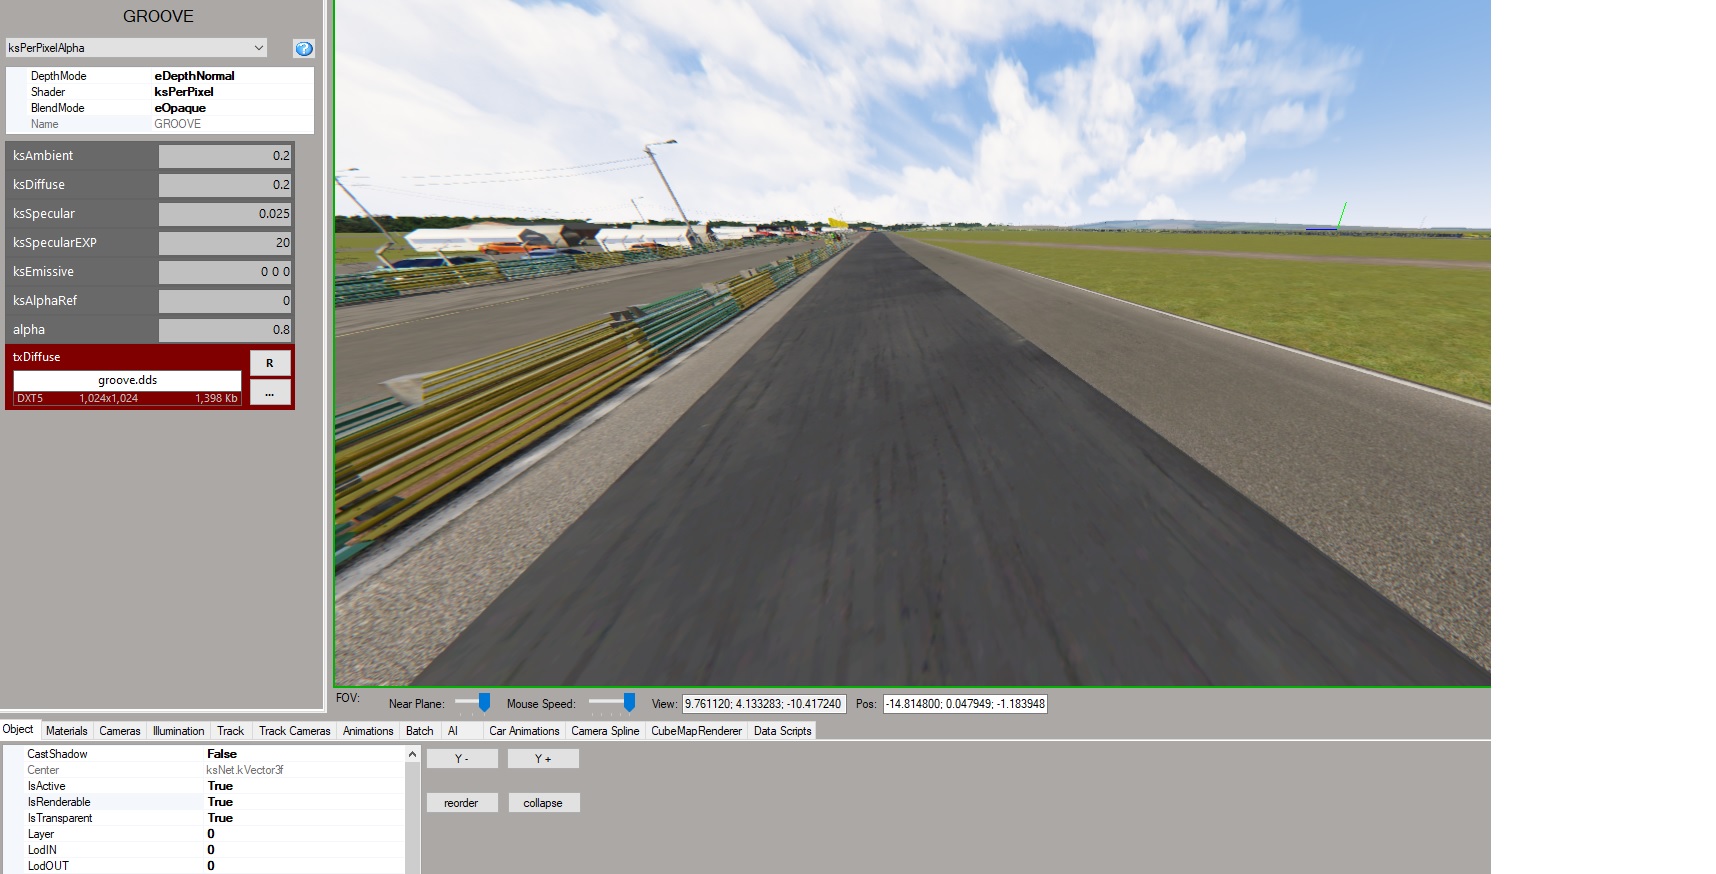
Image 5. Working circuit's groove (after export) in Assetto Corsa
Please, I would appreciate some thoughtful and comprehensive help!
I extruded a groove along a modified fast_lane.ai converted to a curve.
The groove sits 1.8 centimetres above the track object.
The shader and object settings are as in #50 above; you can see them in image. The texture is from an existing track.
In KS editor the groove is a dark path; looks completely unrealistic and nothing like the grooves on other track mods (see image 1.).
Worse still, in Assetto Corsa the car is immersed in the groove, as though it's in six inches of mud (see image 2.). And this is despite the groove object sitting 0.00018 metres above the track surface.
1. My track-groove in KS Editor
2. My track-groove in Assetto Corsa
I'm at my wit's end here and need help!
As an experiment, I examined the groove on a track that works "properly" in Assetto Corsa. The groove in this circuit "works" (see image 3.) I then extracted its groove 3d object, texture and persistence files. But when I import those extracted files directly into KS Editor - with no changes - and export them back to .kn5, I get a similar result as in my disaster, i.e. a patchy "painted" groove in KsEditor (see image 4.) and the same in Assetto Corsa (see image 5.)
Image 3. Circuit with working groove in Assetto Corsa
Image 4. Working circuit's groove (after export) in KS Editor
Image 5. Working circuit's groove (after export) in Assetto Corsa
Please, I would appreciate some thoughtful and comprehensive help!
Last edited:
GRLap
Member
John,
Thank you. And when I changed to alphablend and saw the result (image 1A. here) I thought Eureka!
But when I exported that as a kn5 and opened in AC, I'm getting the same crap result (image 2.A). How is that even possible? Honestly, I feel like Charlie Brown.
1.A In KSEditor with alphablend

2.A The groove in 1.A exported as kn5, in Assetto Corsa

Thank you. And when I changed to alphablend and saw the result (image 1A. here) I thought Eureka!
But when I exported that as a kn5 and opened in AC, I'm getting the same crap result (image 2.A). How is that even possible? Honestly, I feel like Charlie Brown.
1.A In KSEditor with alphablend
2.A The groove in 1.A exported as kn5, in Assetto Corsa
GRLap
Member
Okay, I figured out object inspector and this is strange. Many of the settings in KSEditor are not carrying over when I export the kn5. For example:
Shader is “KsPerPixelAlpha” in the editor but “KsPerPixel” in-game
Transparent is “True” in the editor but “no” in-game
Blend mode is “eAlphaBlend” in the editor but “opaque” in-game
KsDiffuse is “0.2” in the editor but “0.1” in-game
KsSpecular is “0.025” in the editor but “0.1” in-game
KsSpecularEXP is “20” in the editor but “10” in-game
And other differences as well.
I tried deleting the existing kn5, saving it fresh, rechecked but still same issues.
WTH?
Last edited:
