DeepJKL_FIN
New Member
EDIT: new and more detailed manual is now released at: Steam Community
There is also a prototype of Smoothing in the Project settings where i told you can add Roads. It only a prototype but it helps with the "noise" points in the data.
TIPS:
This is the first version of plugin and also on this tutorial, so it will get better, if extra time merges to my use.
Here is a video of action with 10x10km area:
(Select for 1440px60fps quality)
- First the download link: Thomas Kaltvik Software Engineering Limited on GitHub
- If one would like to support or thank, then donate at: Marko at Thomas Kaltvik on PayPal
- The plugin is created to version 1.0 and it supports only cellsize 1 on version 1.0. No promises about next version. My day job is getting ruined becouse of this adventure to the plugin code and tests.
- You need to install SQL Server to use this plugin. Select the free Developer edition, since it supports databases over 10Gb. A area covering 10x10km with index results almost 20Gb database.
- Once you have installed the SQL Server and made a database to it, figure out the connection string which is like:
- Data Source = YourServerName; Initial Catalog = YourDatabase; Integrated Security = True
- You need Lidar data in .LAS or .LAZ format, or directly as ASCII grid with cellsize = 1 (meter).
- There can be many tiles or just one. It is prefered to merge them to one big, but multiple works when the tiles are neighbour tiles forming a square. So 1, 4, 8 and 16 tiles is tested to work.
- If your data is allready in ASCII format, please jump to: 12.
- If you have .LAZ formated lidar, use Laszip.exe to un-pack it to .LAS format.
- Once in .LAS form, copy the file(s) to one folder, that is easy to access, like c:\lidar
- Download and install FUSION. I prefer that this is in c:\FUSION so it's easy to access.
- Run from Command Prompt (CMD) for all the .LAS files:
- c:\FUSION\GroundFilter c:\lidar\outputFileName.lda 1 c:\lidar\lasfilename.las
- c:\FUSION\GridSurfaceCreate c:\lidar\dtmOutputFileName.dtm 1 f f 1 0 0 0 c:\lidar\outputFileName.lda
- Pay attention to those 1's and f's.. they have a meaning. You can run the Fusion commands separately like GroundFilter and it will tell you what the Switches and other options are.
- c:\FUSION\DTM2ASCII c:\lidar\dtmOutputFileName.dtm
- c:\FUSION\MergeRaster c:\lidar\merged.asc c:\lidar\*.asc
- Install and open SAGA-GIS
- Open the merged.asc file
- Open Geoprocessing menu -> Grid -> Gaps -> Close Gaps and process the file. The closing will take a long time so do something else that time.
- Once it's Gapped, select Import/Export -> Grids -> Export ESRI Arc/Info Grid and save the gapped file as c:\lidar\mergedAndGapless.asc
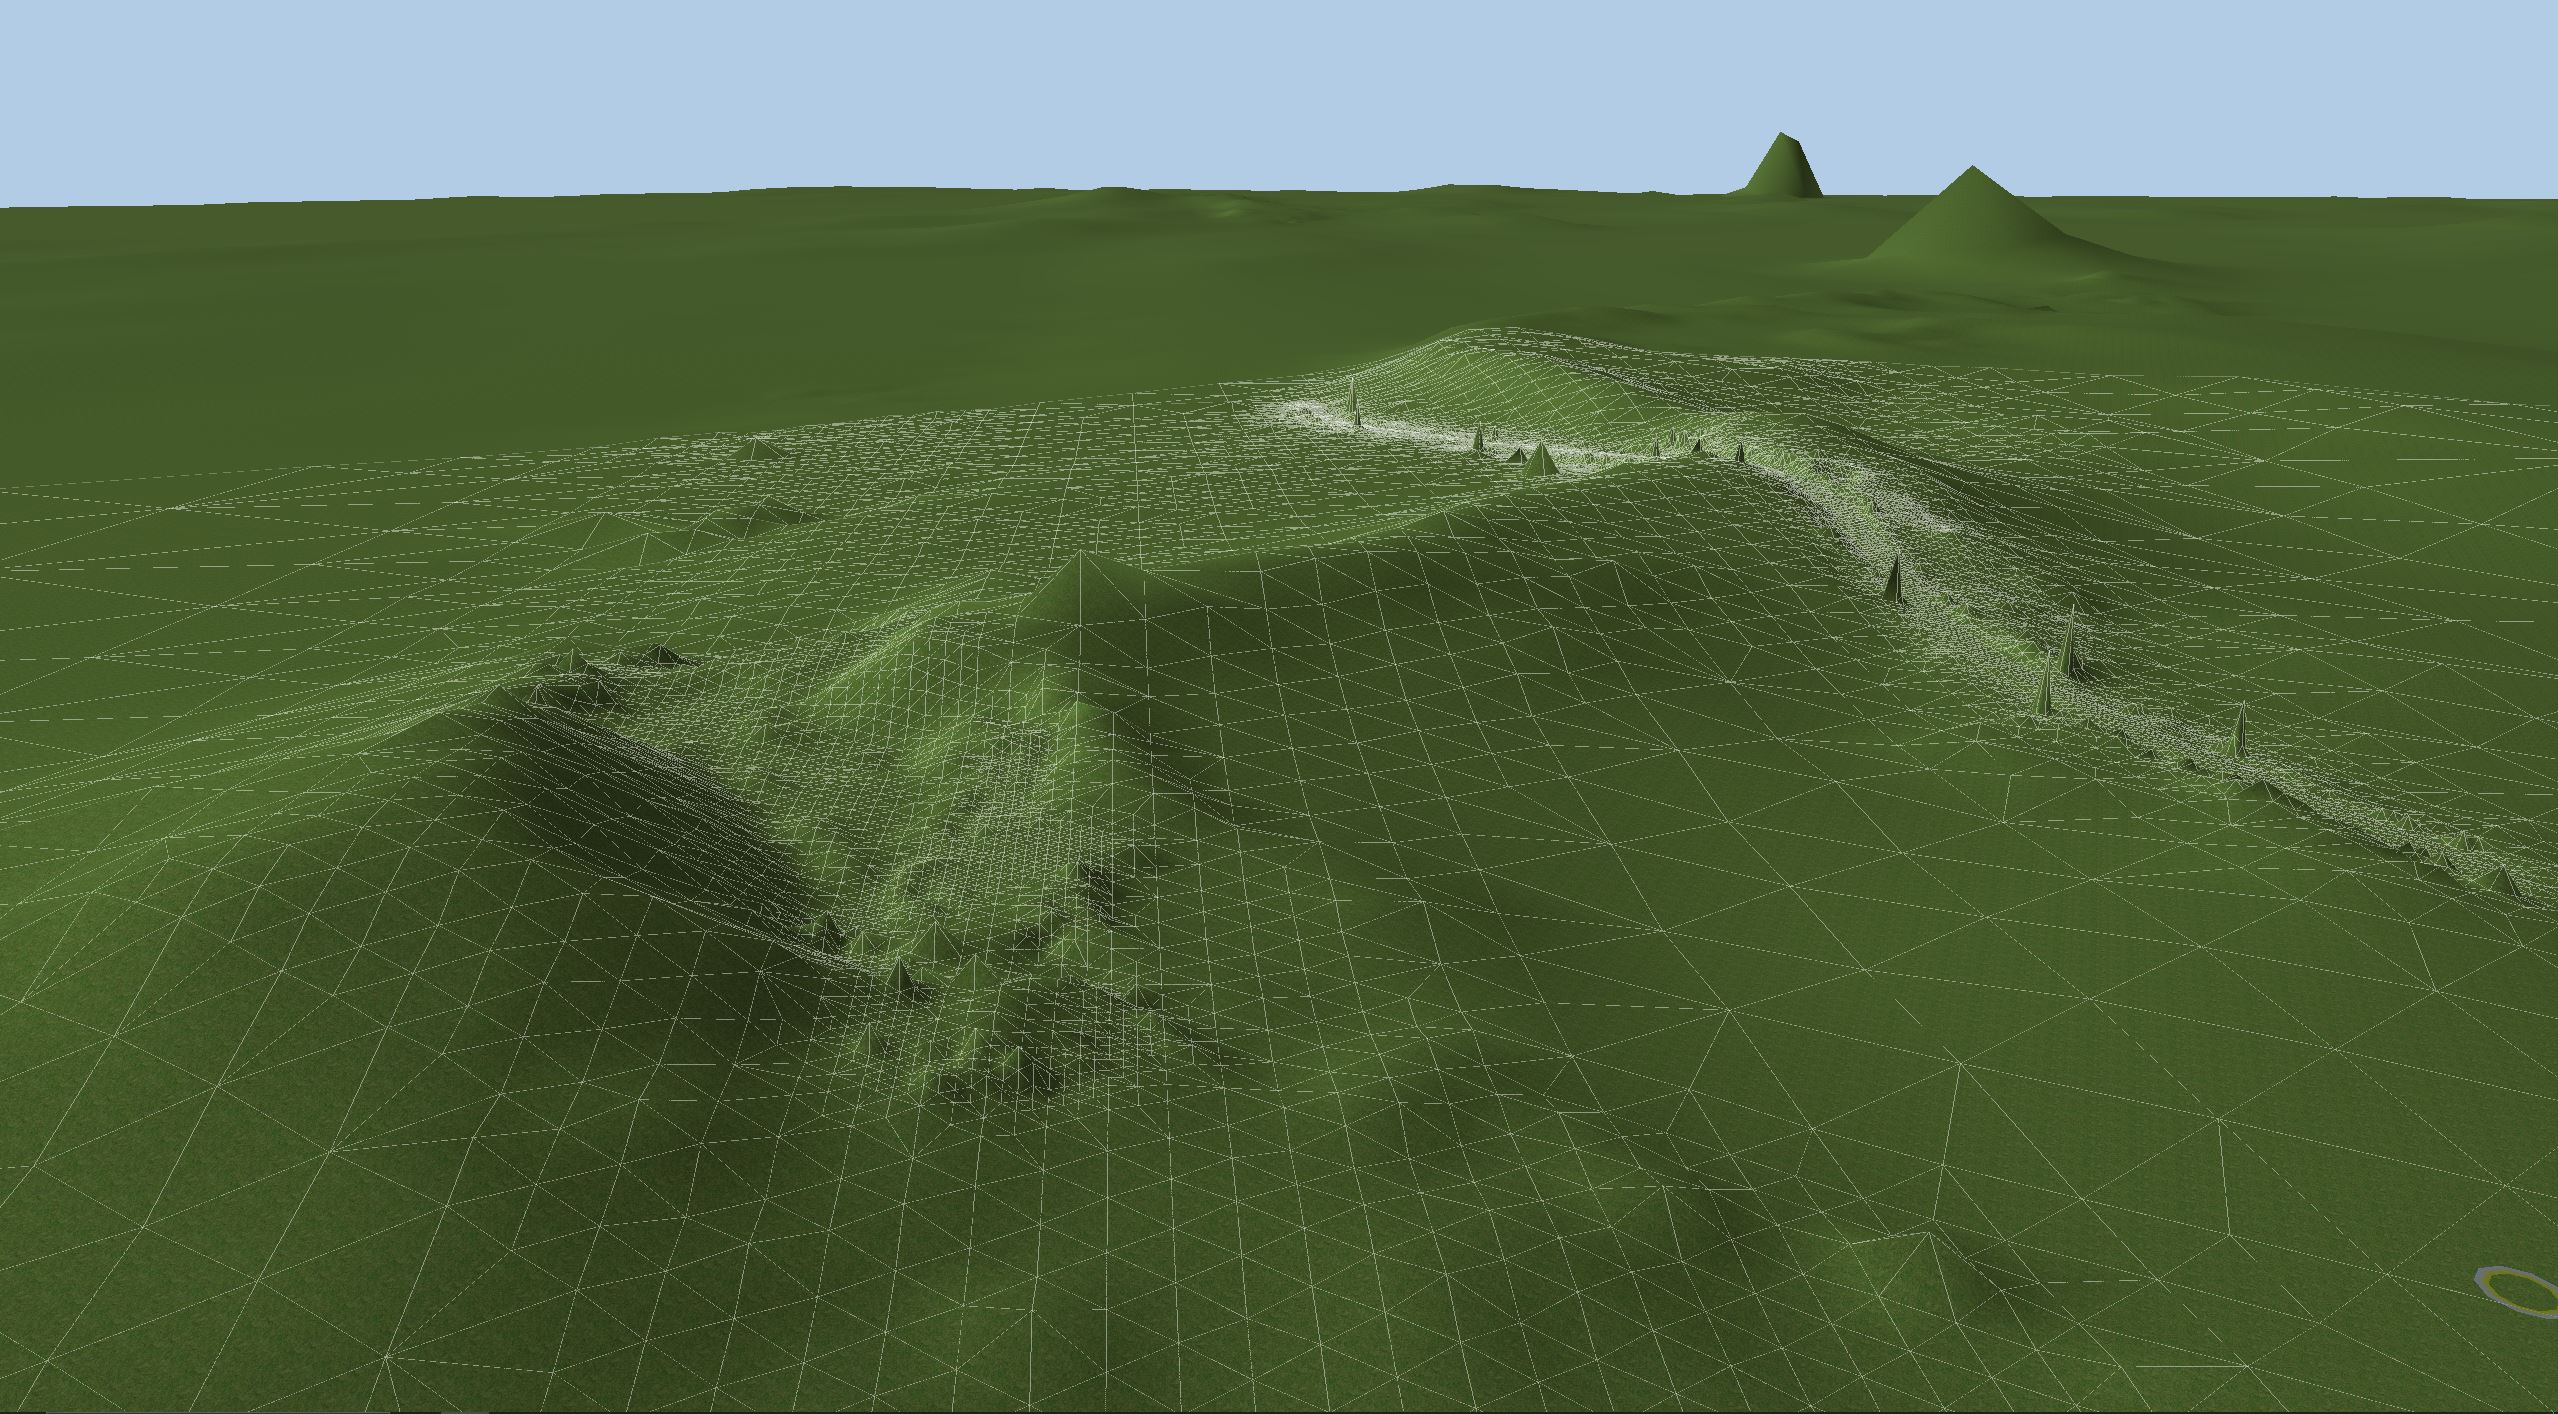
- Once the time consuming save is done, select once again Geoprocessing -> Terrain Analysis -> Morphometry -> Slope (Slope, aspect, curvature) and make it from the gappless grid.
- Save the slope as image -PNG (Below is screenshot of 12kmx12km area which is 16 ASCII grids combained.
- We can use this as the background image in RTB and we can also use it to create roads in alternative way, wich i'll tell in Tips after basic instructions.
- Create a project folder and copy the mergedAndGapless.asc file to there.
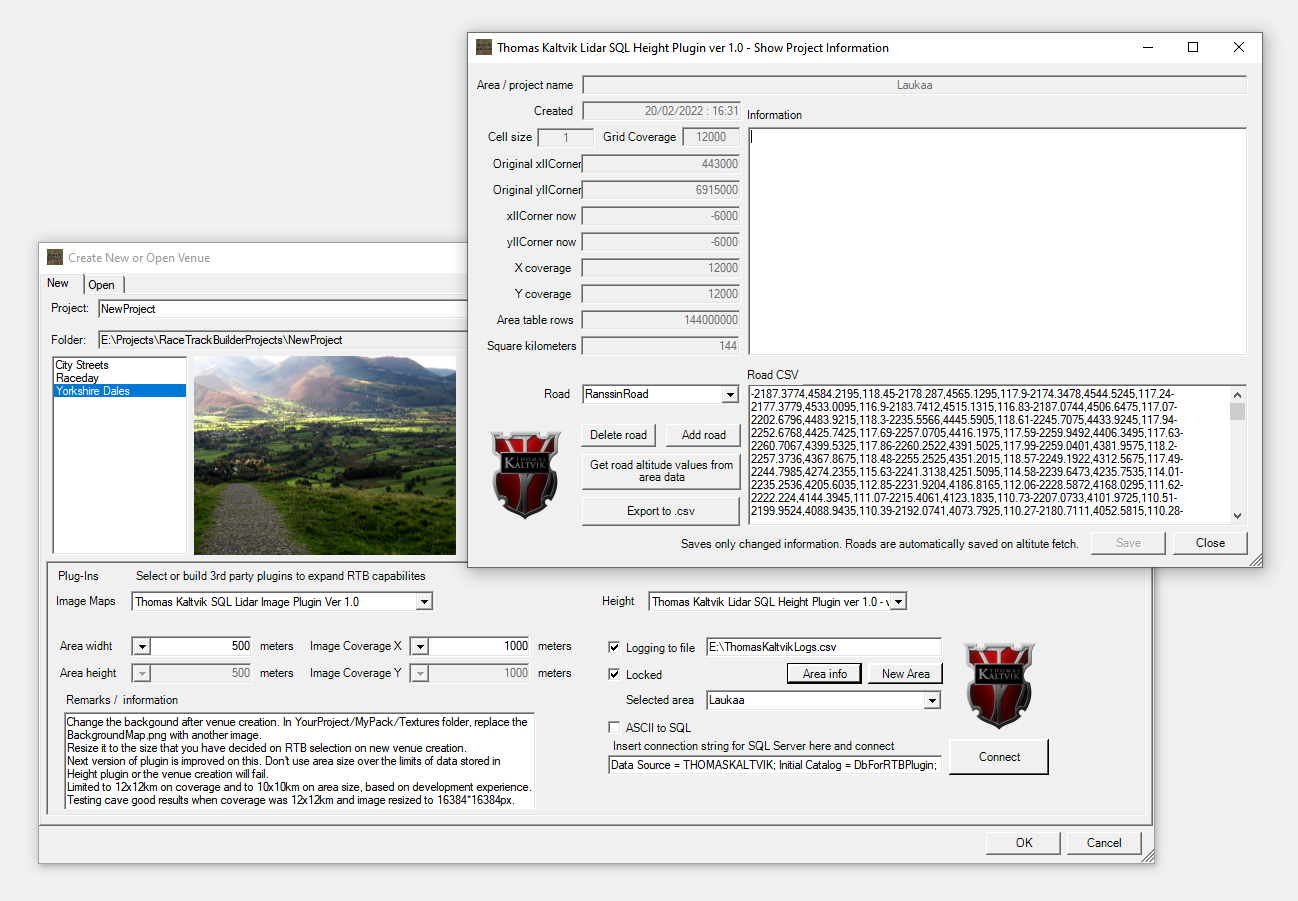
- Open RTB and select the Lidar SQL height plugin.
- Paste the connection string
- Click Connect (If not Success! you have something wrong with the server or string -> go figure that out.)
- Create a new Area (or select existing empty one)
- Click ASCII to SQL checkbox -> click Read/Write button
- From new windows click Browse and select the folder where the .asc file is.
- If it tells you that file(s) were found everything ok and the information should update.
- Click Read/Write button. This might take also a lot of time and the estimate and progress bar have some bugs, so they might not always work (Before i fix them) so trust me that the process is okay and onces it's complete, the progress bar and finished time are updated. You can also check the progress in SQL Management Studio.
- IF there is No-Data values, you will be prompted about it! NOTICE: If 0,0 has No-Data value the new venue creation will shurely fail! So please close the gaps in the data, like described above. The RTB starts the venue creation by checking the height on 0,0 and all other altitude values are compared to this. (I tried to manipulate and make a alternative method for this, but the 100% result comes only with closed gap - NO no-data values- so please follow the instructions.)
- Close the Read ASCII form.
- Your ASCII data is now set so that the center is 0,0. You can check the xll and yll (Lowest left corner) to verify the extents of the area. The original xll and yll are saved in the Area Info if you need them for something. Example bringing paths from Google earth to RTB. This can be done by manipulating path values XY. There is free converters for the lat/long values.
- Select the SQL Lidar Image plugin and set area widht. If your data is 6km*6km, set 5km*5km as an area and 6km*6km as Image Coverage. These are the values that are used and the RTB venue size is overriden by these.
- Select image background image size 512-16384. (The biggest is good for this.)
- Set Subdivide or not. Test this if problems creating a new venue.
- Click ok once you have set a project name.
- If nothing happens, gently click on the plain green area. I have noticed that some times the mouse click makes the venue to update and show gotten values from SQL as altitude changes.
- Install and open Irfanview
- Open the created Slope image.
- Resize it to the size that you selected the background to be. 512-16384.
- Save the image somewhere as BackgroundMap.png
- Copy the image to the newly created projects Xpacks\MyPack\Textures\
- Say yes to overwrite. The plugin created image can be saved if you want to. This point is just a blank white.
- On RTB click F5 button to refresh textures.
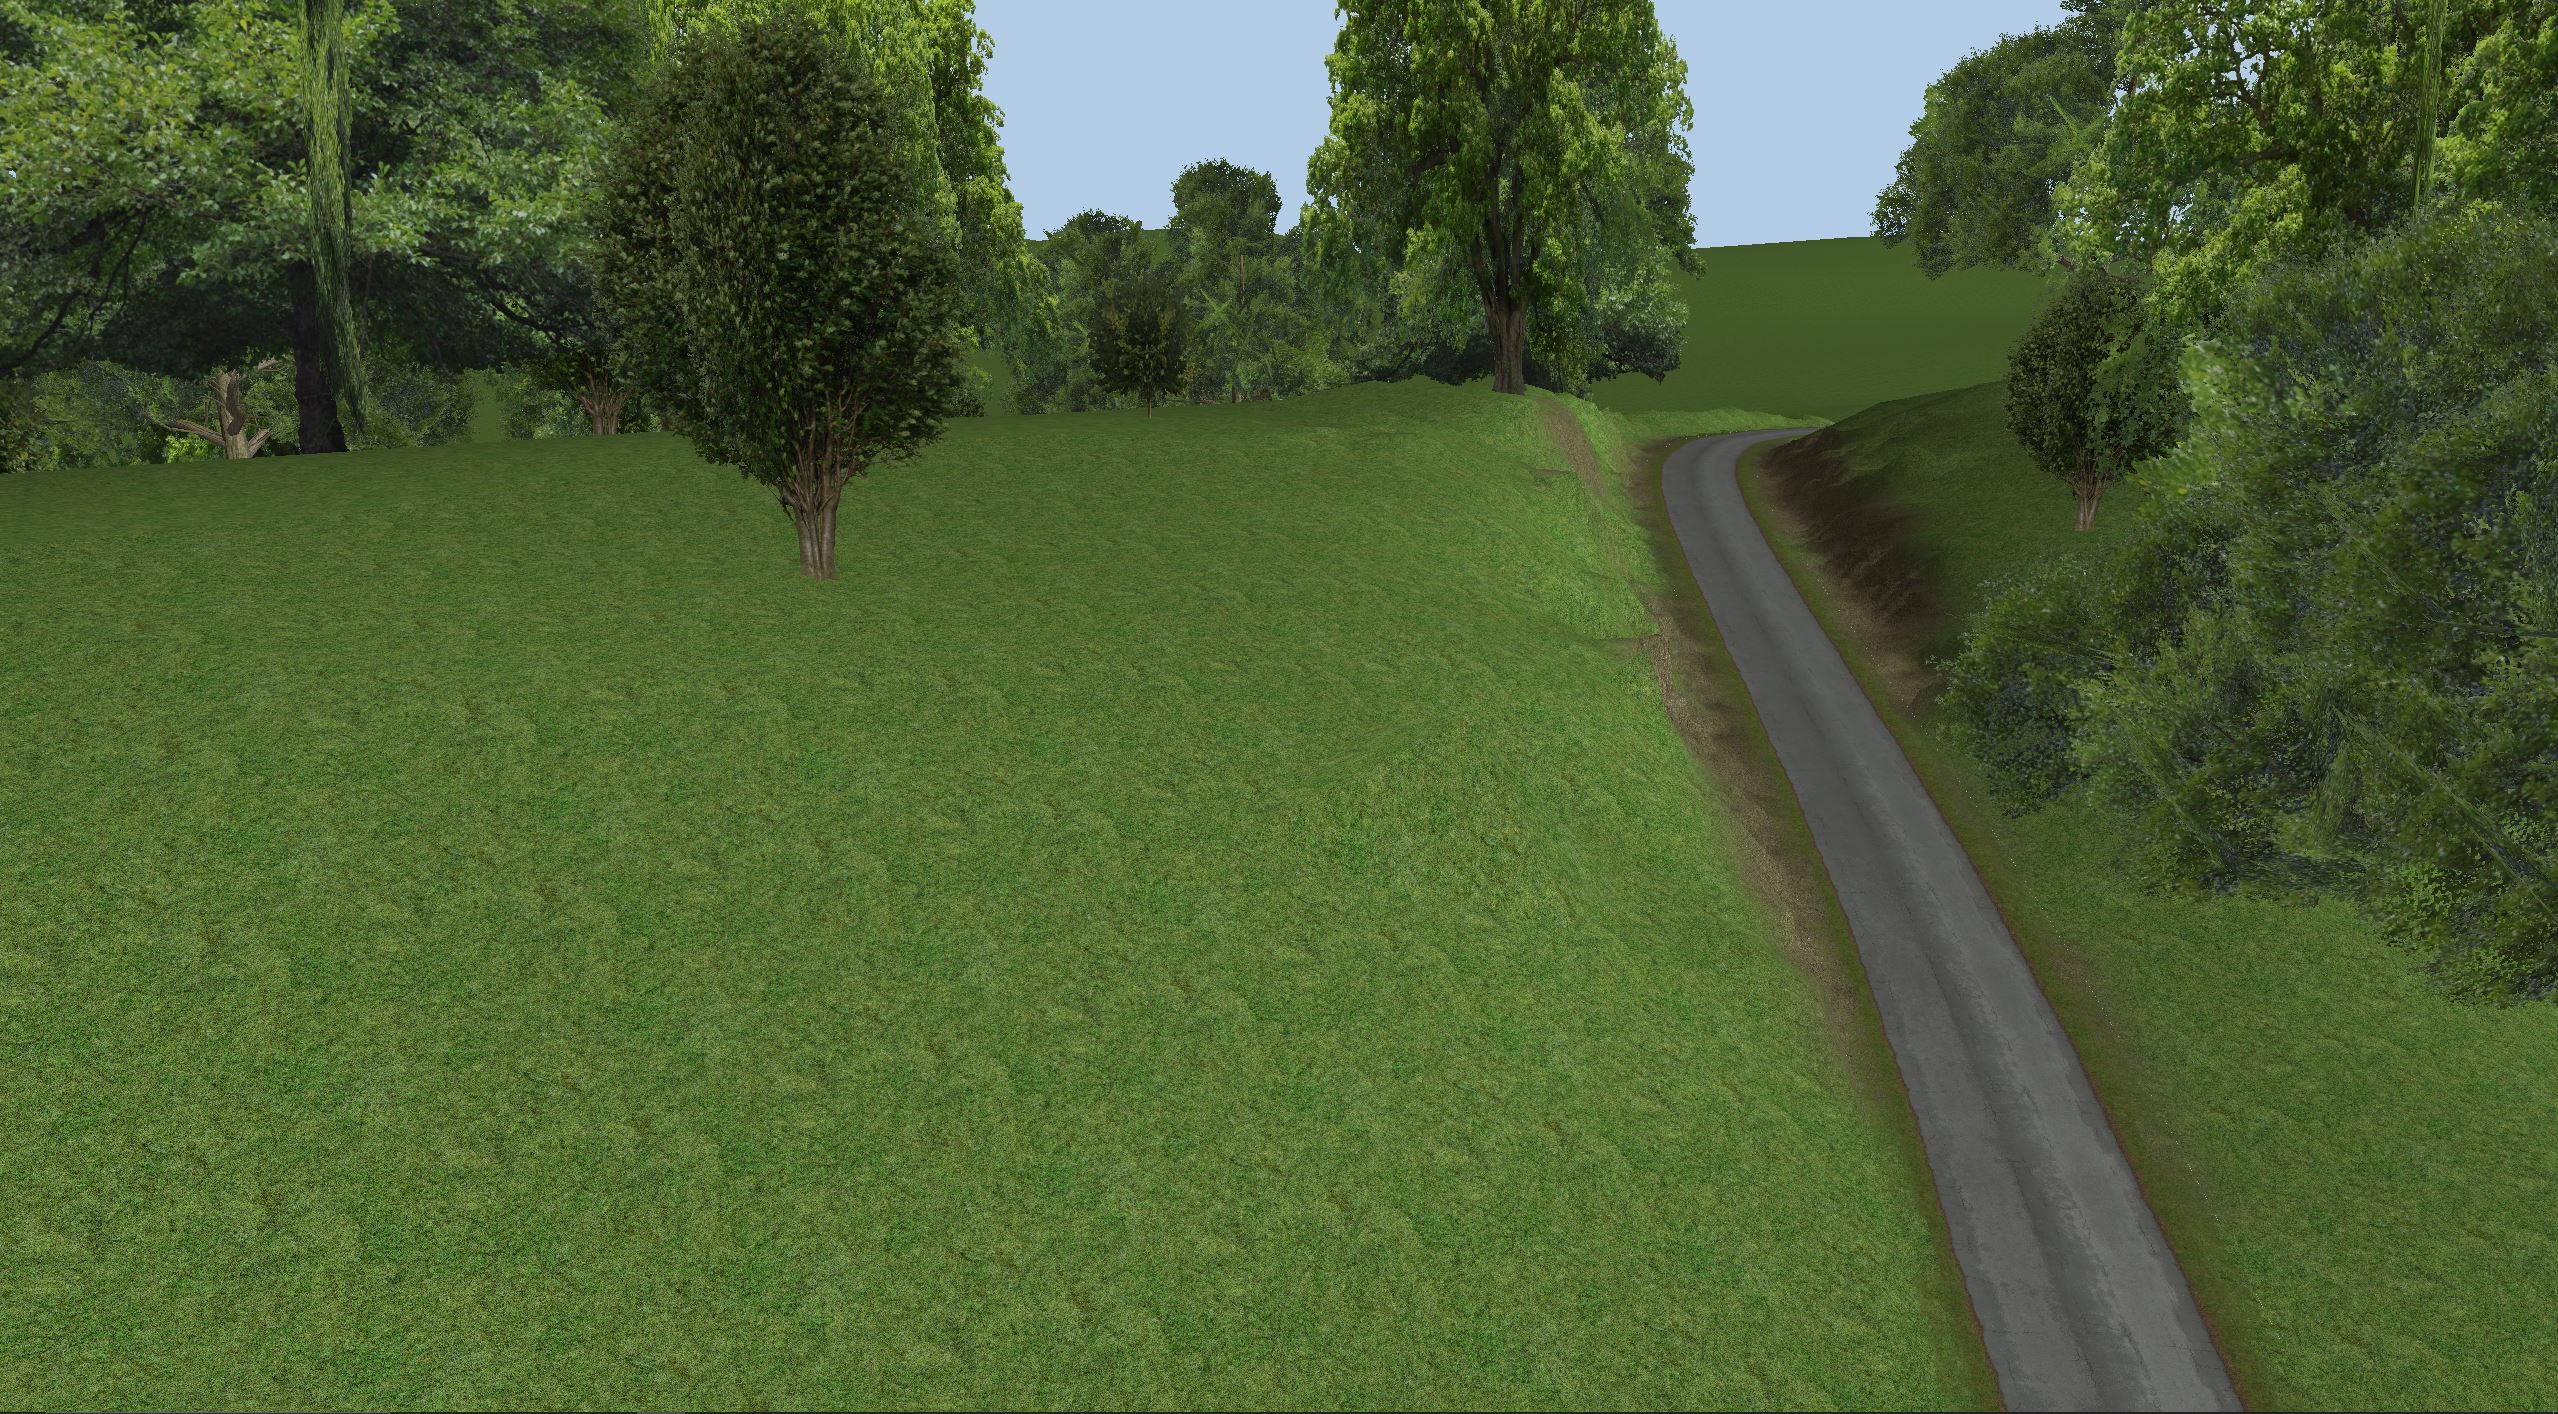
- Start modelling your venue. Subdivide where needed to get more altitude points from SQL.
There is also a prototype of Smoothing in the Project settings where i told you can add Roads. It only a prototype but it helps with the "noise" points in the data.
TIPS:
- You can open the original Slope image in Inkscape and offset the image and editor so that the slope images center is on (0,0). Make also sure that the Y-axis in Inkscape is pointing positive upwards.
- Set Inkscape XML editor to only have Absolute values.
- Draw the road(s) as paths and then use Inkscape export plugins to export the XY value pairs. SOME INSTRUCTIONS on Inkscape plugins can be found here.
- Open RTB and open the project. Select Edit -> Venue -> Plugins -> Height and SQL lidar plugin.
- Click on the Roads and Information button. (Can be accessed on New Venue creation by clicking Area Info)
- Add Road -> Browse the file or paste to editor. Give name and save.
- Select the newly created road and click "Get Road altitude values from area data" and voila.. the road points have Z value. The road is automatically saved to database, so you can access it any time and add new roads. The number of roads in project/area are no restricted.
- Click Export to .CSV button and select where to save.
- Close the Venue edit window and select RTB File -> Import track and select the file just saved.
- Click ok and voila! nro.2, the road should be in correct place.
This is the first version of plugin and also on this tutorial, so it will get better, if extra time merges to my use.
Here is a video of action with 10x10km area:
(Select for 1440px60fps quality)
Attachments
-
158.8 KB Views: 476
Last edited:
")
