W.I.P. Mexico 67 Conversion/Scratch Project

Discussion in 'Tracks' started by Ricardo Rey, Aug 7, 2017.

  1. Ricardo Rey

    Ricardo Rey Active Member

    Joined:
    Jun 30, 2017
    Messages:
    245
    Likes Received:
    94
    Location:
    Birmingham
    I have been piddling with someone else's conversion and jumping all over the place. I started this Mexico67 project to mainly learn Blender, and also to learn AC track making. I decided to share my experience so that the learning would be focused to a specific project. I think it would be easier to get help if you see the progress, etc. I intend to use the basic current track surface (completely re-done inside) and scratch everything else.

    I chose the Mexico 67 GPL track for several reasons:
    1. It is fairly flat.
    2. The track fit nicely on the Google map of the real current day track. I think this is one track Papyrus came close on.
    3. Not a lot of difficult objects.
    4. I like the track!
    5. Hopefully will not be to complicated.
    6. It's straight from GPL and not a conversion of a conversion
    7. I did not find it already in AC or in WIP (I still would do it for learning)

    NOTE: Some of the objects that will initially be seen are place-holders and work done by the GPL community. So there is no confusion, these will be replaced.

    I hope you agree.

    My first dilemma is about the track mesh as is. It was built for adding two types of textures; the main road surface and the side road surface.
    Mexico67Track2.jpg
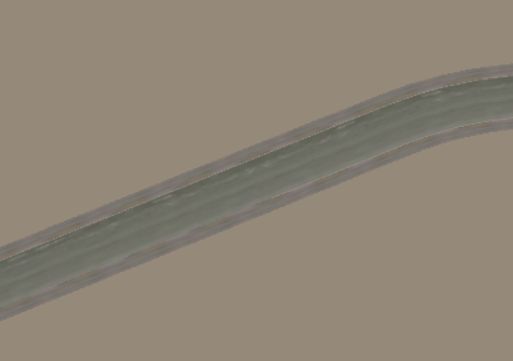
    Should I continue this way or merge/join and 1 texture that handles the differences?
    Mexico67Track1.jpg
     
    Last edited: Aug 8, 2017
    Johnr777 and luchian like this.
  2. Ricardo Rey

    Ricardo Rey Active Member

    Joined:
    Jun 30, 2017
    Messages:
    245
    Likes Received:
    94
    Location:
    Birmingham
    Thanks to the tutorials and guidance from @LilSKi on smoothing a track, I have completed the track mesh. About to start in refining/smoothing terrain. This will be a new venture for me.
     
    Last edited: Aug 8, 2017
  3. Johnr777

    Johnr777 Moderator

    Joined:
    Jul 26, 2017
    Messages:
    1,050
    Likes Received:
    614
    I think it would be a great track to go alongside Monza Historic! Which is also an idea if you are interested... Why not de-associate the "67" reference and call it Mexico Historic? Would go better with the AC theme IMO
     
  4. Ricardo Rey

    Ricardo Rey Active Member

    Joined:
    Jun 30, 2017
    Messages:
    245
    Likes Received:
    94
    Location:
    Birmingham
    Good idea! I had not thought about what to call it. I used "67" as a reference. But yes...I like it.
     
  5. Johnr777

    Johnr777 Moderator

    Joined:
    Jul 26, 2017
    Messages:
    1,050
    Likes Received:
    614
    Great, cant wait to follow the progress! If i can be of any help, let me know!
     
  6. Ricardo Rey

    Ricardo Rey Active Member

    Joined:
    Jun 30, 2017
    Messages:
    245
    Likes Received:
    94
    Location:
    Birmingham
    I know I will need it. I am new to Blender. My main thing right now is organizing the parts. You are welcome to jump in at any time. This is my first time by myself. I worked on a few parts of projects in the early GPL days.
     
  7. Ricardo Rey

    Ricardo Rey Active Member

    Joined:
    Jun 30, 2017
    Messages:
    245
    Likes Received:
    94
    Location:
    Birmingham
    Actually you could give some advice (or anyone for that matter). I built a few GPL tracks and some one else finished them (LongBeach76). The GPL tracks were made with .3do's. The track 3do was the track and terrain combined. I converted and made 2 files from the GPL track. One with complete scene. The other (duplicate) as the track physics file and have been deleting everything but the track. I have been using CTRL C and just swiping those areas that are not track and deleting them. I will have to do the same for the main file and delete the track from it.

    If you know a better way, please let me know.

    Is there a way to isolate specific areas to subdivide surface? If so, That would be easier.
     
    Last edited: Aug 8, 2017
  8. Johnr777

    Johnr777 Moderator

    Joined:
    Jul 26, 2017
    Messages:
    1,050
    Likes Received:
    614
    The blender guys can be of more help there, I’m more familiar with 3dsmax...

    Didn’t you run the track originally through 3dsimed? I thought that app would split all materials into their own objects, or sub objects... no?
     
  9. Ricardo Rey

    Ricardo Rey Active Member

    Joined:
    Jun 30, 2017
    Messages:
    245
    Likes Received:
    94
    Location:
    Birmingham
    Well it did, but the 3do for the track includes more than the track. Here is the track.3do in 3DSIMED:
    MexicoTrack.jpg
    Which is OK, but I wanted to work on the track surface only to Quadrify/subdivide and I'm trying to figure out how to do that without applying to the grass area as well.
    P.S. We have come a long way from the above to AC.
     
  10. Ricardo Rey

    Ricardo Rey Active Member

    Joined:
    Jun 30, 2017
    Messages:
    245
    Likes Received:
    94
    Location:
    Birmingham
    MexicoAllTrack3d.jpg
     
  11. Johnr777

    Johnr777 Moderator

    Joined:
    Jul 26, 2017
    Messages:
    1,050
    Likes Received:
    614
    In max there’s an option to select faces based on a material name or ID so you could select the road material, and invert the selection afterwards then delete...I’m sure there’s something similar in blender
     
  12. Ricardo Rey

    Ricardo Rey Active Member

    Joined:
    Jun 30, 2017
    Messages:
    245
    Likes Received:
    94
    Location:
    Birmingham
    Here is the GPL pit
    20170807154519_1.jpg
     
  13. Ricardo Rey

    Ricardo Rey Active Member

    Joined:
    Jun 30, 2017
    Messages:
    245
    Likes Received:
    94
    Location:
    Birmingham
    Thanks! I want to learn it in Blender. Looking at LilSKi's tutorial, I need to move it to it's own layer. Probably other stuff too. I'm just trying to figure how to do it. I think I know one way, just want to do it the right way.:)
     
  14. Ricardo Rey

    Ricardo Rey Active Member

    Joined:
    Jun 30, 2017
    Messages:
    245
    Likes Received:
    94
    Location:
    Birmingham
    Well I figured out how to get things moved to layers, and now able to edit the track surface only.
    Question: When I import objects, can I import to a new layer? And if so, how to see every thing at once. Seems like i need to import to layer 1??

    If anyone has pictures of the early Mexico "60s" track, let me know.
     
    Last edited: Aug 9, 2017
  15. LilSKi

    LilSKi Well-Known Member

    Joined:
    Apr 6, 2015
    Messages:
    370
    Likes Received:
    329
    Whatever layer you are in is the layer it will import to. Hold the shift key to show more than one layer.
     
    ReKow1306 and Ricardo Rey like this.
  16. Ricardo Rey

    Ricardo Rey Active Member

    Joined:
    Jun 30, 2017
    Messages:
    245
    Likes Received:
    94
    Location:
    Birmingham
    MexicanGrandPrix1967_3.jpg

    P.S. I'm not asking to flood this post with pictures, if you have links would be best. If you do have helpful photos not found on the web, please post. I have about 104 to be exact.
     
    Last edited: Aug 9, 2017
  17. Ricardo Rey

    Ricardo Rey Active Member

    Joined:
    Jun 30, 2017
    Messages:
    245
    Likes Received:
    94
    Location:
    Birmingham
    As I'm working on the track, I am perplexed as to best handle the curbs/kerbs, for lack of a better description (see photo above). I still need to add more subdivision and faces.They are not all the way around the track. Should this part of the track mesh, or a string object? Below is what I have now. They are rounded sort of speak. Almost like a half tube.
    Mexico67_hairpin.png
    BTW, @Johnr777 asked about helping. I don't have a problem with a community effort. I am still learning. I take no pride in doing this alone.
    Also, a real pain to fix the track. I basically gutted everything inside the track.
     
    Last edited: Aug 9, 2017
  18. Ricardo Rey

    Ricardo Rey Active Member

    Joined:
    Jun 30, 2017
    Messages:
    245
    Likes Received:
    94
    Location:
    Birmingham
    Here's a better shot.
    mexico-1964-surtees-and-bandini.jpg
     
    dans_garagiste likes this.
  19. Ricardo Rey

    Ricardo Rey Active Member

    Joined:
    Jun 30, 2017
    Messages:
    245
    Likes Received:
    94
    Location:
    Birmingham
    I'm not putting words here to hear myself speak, you may comment.:nerd: I feel like Facebook.
    The track as is seems too perfect as I compare it with photos and videos. There are really only two places with camber; the hairpin and the last corner. I have added to track, but will need to be tested at some point.
     
  20. LilSKi

    LilSKi Well-Known Member

    Joined:
    Apr 6, 2015
    Messages:
    370
    Likes Received:
    329
    There are many ways to do curbs but one way I found was in edit mode select the edge of the road where you want the curb. Duplicate that selected edge and then separate selected. Get out of object mode and now select the new object you created which that edge. Then hit ALT+C and select curve from mesh (you just created a curve from that road edge). I then like to hit shift+ctrl+alt+c and set origin to center of mass. Now you model the cross section of the curb shape with no end caps so it can be put into a array much like how you do the road. Assign it to the new curve you created from the road edge. After some fine tuning in object position it will follow the road edge perfectly.
     
    Ricardo Rey likes this.
  1. This site uses cookies to help personalise content, tailor your experience and to keep you logged in if you register.
    By continuing to use this site, you are consenting to our use of cookies.
    Dismiss Notice