QUESTION How to use txDetail with ksPerPixelMultiMap

Discussion in 'Tracks' started by Jonas Mortensen, Aug 4, 2022.

  1. Jonas Mortensen

    Jonas Mortensen New Member

    Joined:
    Aug 2, 2022
    Messages:
    3
    Likes Received:
    2
    Hey!
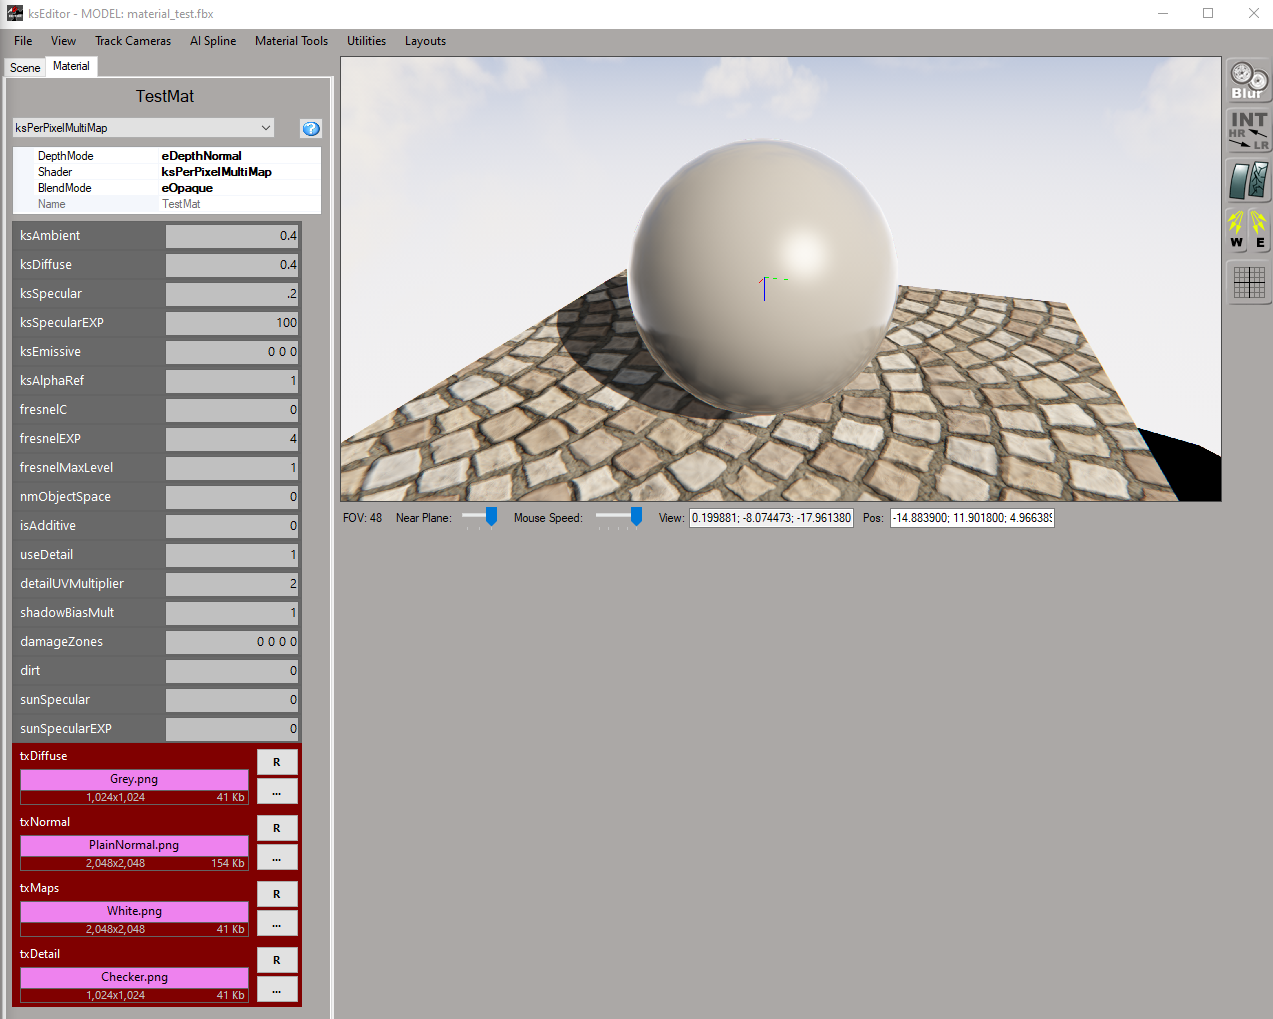
    I'm new to track modding in Assetto Corsa and I'm trying to understand the material workflow. I'm using the ksPerPixelMultiMap shader and feel like I have a good grip on all the texture maps except the detail map.
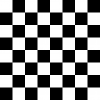
    From the image shared here: https://www.assettocorsa.net/forum/index.php?threads/track-materials-shaders.10174/ the detail map seems like a greyscale texture which I expected would modulate the diffuse color and make it brighter/darker with grey being neutral but when I assign a checkered pattern to the txDetail property of my grey sphere, I see no difference. I set useDetail and detailUVMultiplier to 1.
    Am I missing something?

    MaterialSetup.png

    This is my first real modding attempt and I'm really enjoying all the good info this forum provides!
     

    Attached Files:

  2. Johnr777

    Johnr777 Moderator

    Joined:
    Jul 26, 2017
    Messages:
    1,050
    Likes Received:
    614
    Hello Jonas!

    Firstly, you'll need to use DDS textures, not PNG. DXT1 to 5 or BC1 to 3 compressions

    Secondly, I believe to get the detail map to show, the diffuse needs to have a black alpha channel, and saved as DXT5 or BC3. Hope this helps!
     
    Fuzo and Jonas Mortensen like this.
  3. Ryno917

    Ryno917 Member

    Joined:
    Dec 31, 2017
    Messages:
    30
    Likes Received:
    18
    As John mentioned, the diffuse alpha controls its blending with the detail texture. Note that the blending is more like setting it to "multiply" in Photoshop; it doesn't make the diffuse invisible (unless the diffuse is white).

    The main usage for this in AC is on cars; the main diffuse of a car without a full livery is just an AO texture with an all-black alpha. This causes the AO to "multiply" with the detail texture, and then the detail texture gets used to give the body colour. This setup allows street cars with different colour bodies while only needing to change the small detail texture for each car, instead of the whole diffuse (AO) texture.

    The detail does not need to be greyscale, it can be whatever you want. On cars it's often the coloured metal flake or a carbon fiber texture. On tracks it's often an asphalt or concrete or grass texture, for example.

    The alpha channel of the detail texture controls specular falloff, IIRC. That's how the metal flake works on the Kunos cars; the alpha of the detail is mostly black (no falloff) with a few white specs (lots of falloff) to simulate a metal flake effect. The MAPS texture controls other reflective properties in different channels. Off the top of my head, but I believe blue is reflection strength, green is reflection blurriness and red is specular strength.

    On the main multimap shader the UV of the detail is the same as the main diffuse UV, but you set a multiplier for scaling it. On the multi-channel shader used on tracks for the road and grass and the like, the UV of the detail texture is projected from above; so it is not good for objects with more vertical surfaces.

    Hope that helps!
     
  4. Bory123

    Bory123 New Member

    Joined:
    Feb 4, 2016
    Messages:
    10
    Likes Received:
    4
    Please see this:
    [​IMG]
     
    Jonas Mortensen likes this.
  5. Jonas Mortensen

    Jonas Mortensen New Member

    Joined:
    Aug 2, 2022
    Messages:
    3
    Likes Received:
    2
    Thanks for your answers all!

    @Bory123 I actually looked a lot at that image but still completely missed the part talking about the diffuse alpha :banghead: Thanks for sharing

    @Johnr777 Yup that did it! I don't have a good workflow for converting PNGs to DDS so I was hoping to keep everything PNG while I build and wait until release with converting. But it sounds like I'll have to convert to DDS to leverage the full potential of the shader.

    @Ryno917 Thanks for the thorough explanation and tips on car materials. You seem to know the shaders pretty well so I was wondering if you knew what the _AT postfix indicates? Does this have something to do with which shaders to use for track and car?

    I'll be using the detail map with a <1 UV multiplier to break up tiling on materials that are viewed at a distance:
    Detail.gif
     
    John Harding likes this.
  6. Ryno917

    Ryno917 Member

    Joined:
    Dec 31, 2017
    Messages:
    30
    Likes Received:
    18
    The _AT postfix means the shader uses "Alpha Test" transparency. AC has two alpha modes, alphaTest and alphaBlend. I'm not 100% clear on them, but I believe AT is, essentially, a binary alpha; either the surface has 100% or 0% transparency. You can set where the switch point is with the "Alpha Ref" value in the shader's properties to adjust how 'black' the black alpha needs to be before it makes the surface transparent. I believe this shader/alpha mode does not require the object to be set to transparent, but I'm not 100% sure on that. It's useful for some items, like when you have a logo on a flat surface and have a hard edge with no gradation in transparency.

    AlphaBlend allows partial transparency (so for windows and the like), usually requires the object to get an "isTransparent" flag in the object's properties in the editor.

    I'm sure there's more difference between the two, and more specific use cases for them, but I don't know exactly what it is. My impression is that there's a difference in how the two are loaded/in what order/render pass they're in that changes the processing load on the GPU, but that's purely a guess. There's probably some with more knowledge on the subject here that will be more helpful :)
     
  7. Jonas Mortensen

    Jonas Mortensen New Member

    Joined:
    Aug 2, 2022
    Messages:
    3
    Likes Received:
    2
    Thanks @Ryno917 that makes a lot of sense.
    I might actually be able to explain how the alpha tested surfaces are treated differently from the alpha blended ones since I work with other game engines :lol:

    Surfaces are generally split up into opaque surfaces (alpha tested) and transparent ones (alpha blended). The GPU draws meshes one at a time which works well a lot of the time but sometimes meshes might intersect and since mesh B might be drawn later than mesh A, mesh B will appear completely in front even though mesh A might be closer in some areas.
    Render pipelines fix this by maintaining a depth buffer. This is a screen space texture that basically stores the per pixel distance to the nearest surface from the camera. Every time a pixel is drawn, it is tested against the depth buffer to determine if it is closer than the already drawn surface. If it is not, it is behind something and the pixel is discarded (not drawn).

    Unfortunately, this depth buffer trick can’t be used for transparent surfaces. The depth buffer approach works because you are sure that the visible pixel will be at distance saved in the buffer. But with transparent surfaces, multiple “pixels” are visible so it doesn’t work. In practice it means that transparent materials will always sort correctly with opaque objects, but two overlapping transparent objects might give undesirable results.
    • Opaque surfaces are always distance sorted correctly where transparent surfaces might have polygons seem in front when they should be behind
    • Opaque surfaces can determine their visibility early in the shader and skip expensive computations where transparent surfaces will always run the entire shader
    • Transparent surfaces will always draw after opaque surfaces which results in pixels being processed multiple times (overdraw)
    • ^This point is also what is great about transparent surfaces and it’s what allows them to be blended with whatever is visible underneath (like photoshop layers)
    Hope that made just a little sense. Became a longer explanation than planned :)
     
    Ryno917 likes this.
  8. Ryno917

    Ryno917 Member

    Joined:
    Dec 31, 2017
    Messages:
    30
    Likes Received:
    18
    That is my understanding of the system, but put more detailed and eloquently than I would be able to manage :D
     
    Jonas Mortensen likes this.
  9. Anewbieuser

    Anewbieuser New Member

    Joined:
    Aug 20, 2022
    Messages:
    5
    Likes Received:
    0
    Hi I am running into this same problem. Would anyone kindly point out the proper procedure to add the Alpha channel to the AO so that it can reveal the txDetail below? Greatly appreciate it!
     
  10. Anewbieuser

    Anewbieuser New Member

    Joined:
    Aug 20, 2022
    Messages:
    5
    Likes Received:
    0
    Ok I think I got an all black alpha needs to be added and images needs to be saved as A8R8B8G8.....
     
  11. Stavros

    Stavros New Member

    Joined:
    Oct 3, 2022
    Messages:
    4
    Likes Received:
    0
    Hey everyone, I was wondering if anyone could help me with setting up correctly the asphalt material in blender. I don't have much experience in either Blender or ks editor so any help would be appreciated. Thanks a lot in advance.
     
  12. luchian

    luchian Administrator Staff Member

    Joined:
    Jun 3, 2014
    Messages:
    3,007
    Likes Received:
    1,493
    You don't need to do anything in Blender.
    Just the UV mapping correctly, and assign a material/texture to the asphalt.

    The rest (i.e. what is shown in the diagram above) is done in KS Editor.
     
  13. Stavros

    Stavros New Member

    Joined:
    Oct 3, 2022
    Messages:
    4
    Likes Received:
    0
    Thanks Lucian :)
     
  1. This site uses cookies to help personalise content, tailor your experience and to keep you logged in if you register.
    By continuing to use this site, you are consenting to our use of cookies.
    Dismiss Notice